So you’ve got a solid outline and are ready to jump into writing your screenplay. Congratulations! It’s important to celebrate each major step on your screenwriting journey, and beginning the actual writing of your script is one of the most important moments.
If you’ve outlined beforehand, the writing experience will not only be easier, but also more enjoyable. Instead of exhausting brain power on ‘What happens next?,’ you can now focus on being creative and having fun with your writing.
An outline is a scene-by-scene breakdown of the entire story of your screenplay. An outline can be as detailed as the writer needs it to be: it can be a simple breakdown of story elements, or it can be more comprehensive, including action and even lines of dialogue. A general rule of thumb is that the more detailed your outline is, the better it will serve you when it comes time to write your screenplay. If an outline contains a scene breakdown, action and dialogue, it will allow you to focus on making each scene as good as possible, and the actual writing of your screenplay will become an easier, more effective process.
How to Turn Your Screenplay Outline Into a Script
When you outline you can make as many changes as you want to your story without the pressure of writing or rewriting the actual screenplay. You’re free to play with your idea and get your plot points structured correctly without the added stress of writing snappy dialogue or finding an exciting way to describe your car chase. If something doesn’t work in an outline, it is less time and energy to fix it at this point than if you’ve already written the whole screenplay.
Outlines exist in varying lengths depending on the needs of the writer, the producer, the production company or the studio. When outlining for yourself you may keep your outline a little briefer, say, around 10 pages. However, if you’re outlining a feature film for a studio, the outline could run up to 40 pages as more information is added.
Outlining within Final Draft ensures your outline stays with your screenplay, and is endlessly customizable. Final Draft has many powerful features designed to help you outline your screenplay. If you wrote your outline on a separate text document, you can easily copy and paste the text into a blank script template in Final Draft. If you created beats on the Beat Board™ and used them to construct your outline with the Outline Editor™, you can likewise integrate your outline into your script. Simply click the “Send Outline to Script” button on the Outline Editor’s left panel:
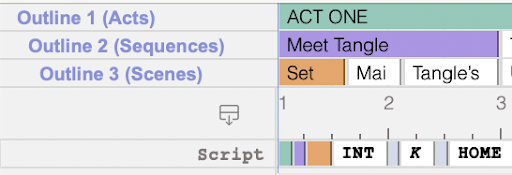
After doing this, the content of the Outline Editor and the Beat Board will appear in your screenplay as Outline Elements. The five Outline Elements are Summary, Outline 1, Outline 2, Outline 3 and Note.
Summary is a general element that is used for a section of the story while Outline 1, 2 and 3 are structure level elements with unique indentation that can be used to layout the structural outline of your story. For example, Outline 1 should be used for Acts, Outline 2 for sequences (a section of the script composed of several scenes) and Outline 3 for scenes (the individual scenes within a sequence).
Meanwhile, Note is used for any additional information that helps you stay organized, whether describing a moment in a scene, details about a prop, or any general “to do” items.
You can use the Outline Elements to guide you as you’re writing, or you can convert them into screenplay elements to create the foundation of your script. To change an Outline Element to a screenplay element go to Format > Change Element To:
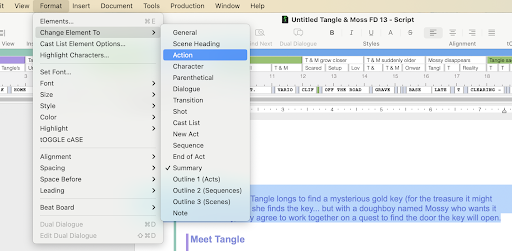
For example, if you turn an outlined element into Action, you’ll already have a section of your script written for you. Just flesh out the description wherever necessary to make it flow and read well. You can do this throughout the whole script and essentially create half of your rough draft (depending on how much action is in your script). Just add other required screenplay elements (scene headings, dialogue, transitions) and you’ll have a finished first draft.
Final Draft Writing Tips: Optimize Your Screenwriting Workspace
Now that you’ve got the technical aspects of screenwriting down, it’s time to facilitate the creative side of the process. The best way to do this is to create the right work environment.
We’re all wired differently and respond to sound and spaces differently. Some of us like to write to music, while others prefer to write in silence. Some of us need isolation, while others can write in a crowded cafe. At the early stage of your writing, you should try different locations until you find the spot that works best for you. The important thing is to feel comfortable with your workspace: the more comfortable you feel, the more creative the mindset you’ll have.
You should also have an ergonomic-friendly workspace that doesn’t cause unnecessary physical strain. Ideally, your keyboard should be within comfortable reach of your hands and the center of your monitor should be at eye level (or else you’ll be unnecessarily moving your neck up and down). So when choosing the location you’re writing in, also be mindful of where you’re sitting, how you’re sitting, and how you’re reading from the monitor. The less eye strain you have when staring ahead at the screen, the easier it’ll be to write (and the healthier it’ll be for your eyes).
Final Draft has several features that focus on improved ergonomics — from Typewriter to Midnight Mode — that can make the writing process more comfortable and help enhance your workspace.
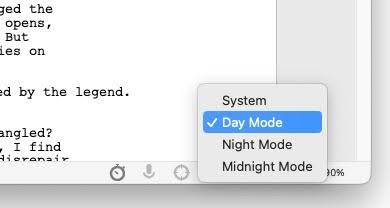
The time of day also affects your environment for screenwriting. Some people prefer to write during the day, while others prefer night. Final Draft’s customizable UI (User Interface) themes let you write in comfort no matter the hour:
Use Day Mode for dark text on a light background.

Use Night Mode for light text on a gray background.
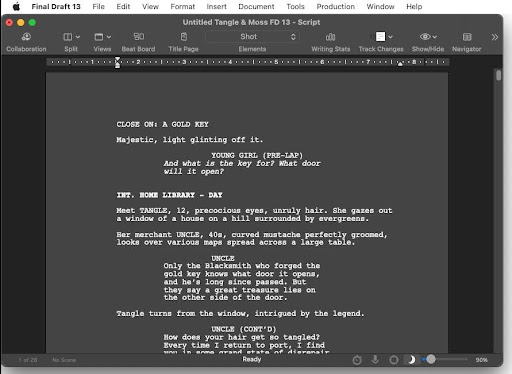
Use Midnight Mode for lighter text on a dark gray background.

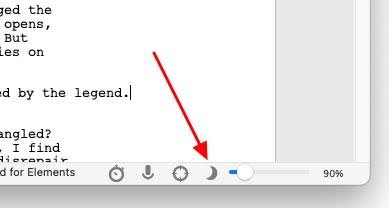
These modes can be selected with the moon icon in the Status bar at the bottom of the application window:
Final Draft also offers different script view options for when you’re writing:
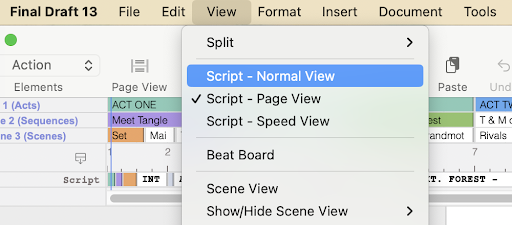
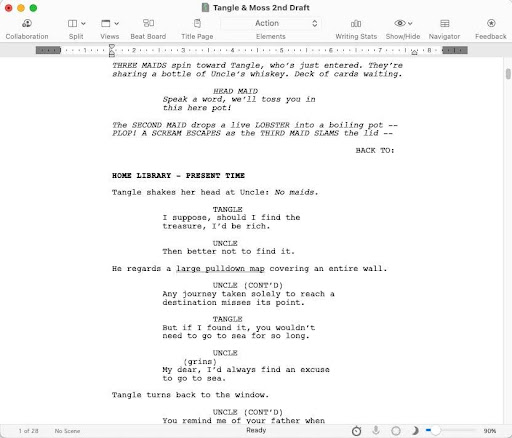
Normal View displays the text of the script with all active components: page breaks (as a line), page numbers, dialogue breaks, mores, continueds, headers and footers.
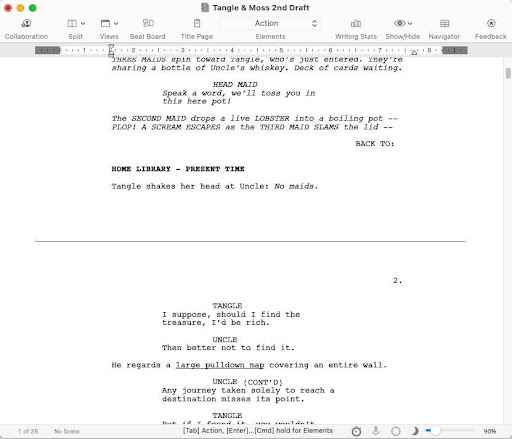
Page View displays the script on more realistic-looking “pages” as it would look if printed to paper, with all active components: page numbers, dialogue breaks, mores, continueds, headers and footers. Page breaks are displayed in the darker areas between pages.

Speed View displays only the text of the script, as if it were a single, continuous page. With Speed View enabled, more of the text appears on screen. It resembles Normal View but without any of the active components, such as page numbers and mores and continueds that occur for page breaks.
Final Draft also offers a distraction-free view via Focus Mode. As with Speed View, Focus Mode hides active components and allows you to just focus on your writing.
Click the focus icon in the Status bar to enter or exit Focus Mode:
Script Collaboration
Many people writing for film and television work with a writing partner. Not only can a collaborator ease the workload, help you keep to deadlines through accountability and bring more ideas to a project, they can also offer feedback throughout the writing process. If you’re struggling to start or finish your screenplay or pilot, perhaps working with a collaborator is the solution.
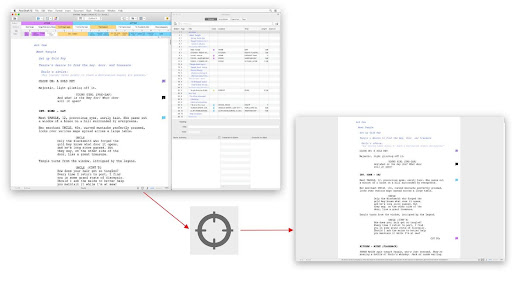
Final Draft’s Collaboration tool allows you to work on your script with other users anywhere in the world in real time. To host a Collaboration Session go to Tools > Collaboration > Host or click the Collaboration icon in the Toolbar:
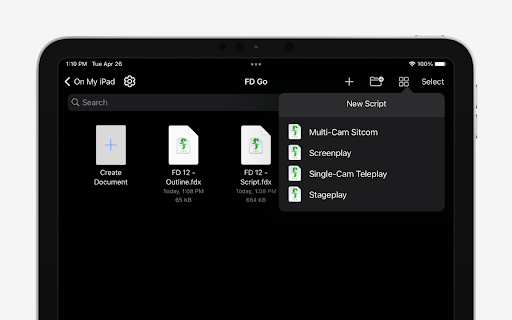
Perhaps you’re often “on the go” due to your job or lifestyle? If so, you might want to use Final Draft Go, which enables you to write your script on your iPad or iPhone. Not only does this mean you can write anywhere, whatever you’re working on can be saved to the iCloud and will be accessible on multiple platforms:
Setting Writing Goals
To stay motivated and productive you should create a personal work routine.
Put aside a certain amount of time to write each day and stick to this schedule. Consistency is important. Also give yourself a daily writing goal or page count quota: 4 to 6 pages a day is a common target for professional screenwriters.
At the end of every writing session, you’ll feel a sense of pride and satisfaction when you look at your page count and see you’ve reached your daily quota.
Once again, you should embrace these small victories. Day by day, page by page, you’re being productive and getting closer to finishing your screenplay.
Start Writing
Now that you’ve got your work environment and work routine down, it’s time to actually write.
You might be nervous at first, which is perfectly normal. However, if you follow the previous steps and have your outline as a guide, this will help you to feel more secure: think of it as following a GPS to get to a really fun vacation spot.
Also, you don’t have to show anyone this initial draft of your script. Many screenwriters think of the first draft as “a vomit draft.” What’s important at the early stage is simply to get the words on the page and reach your page count quota.
Revising your script to be as good as possible comes later.
Building a 3 Act Screenplay
Before moving onto the next lesson, write your first scene of your script.
And then your first act.
And then your second act.
And finally, your third act.
If you stick with your established work routine, you’ll eventually finish a rough first draft.
That’s when it’s time for our next lesson: rewriting and editing.