Making Your Script Look Professional
We’re at the home stretch, but there’s still a little more work to be done.
Even if your script is solid from a story perspective, getting it ready for the marketplace or a production team is another matter. If you expect professionals working in the film and television industry to take your script seriously, it needs to look and read professionally. So let’s get your script into shape!
Editing Your Script For The Page
Recall our first lesson and make sure everything is properly formatted and looks good on the page: no unnecessary transition shots, no big blocks of description, space out your action shots, etc. You want to make sure your script looks professional upon a cursory glance from agents, managers, producers or script readers. This is one of the easiest things to accomplish with some technical skimming of your script, focusing on description and formatting.
If you want to double-check that everything is properly formatted throughout your script, use Final Draft’s Format Assistant feature. Even with Final Draft automatically formatting your script to industry standards, mistakes may occur while you’re writing or editing your script. Format Assistant will alert you if there are any formatting irregularities: a character cue with no dialogue, dialogue without a character cue, blank spaces, empty elements, etc.
Go to Tools > Format Assistant. The Format Assistant will search your script for errors and if it finds an error, it will highlight the paragraph containing the error:
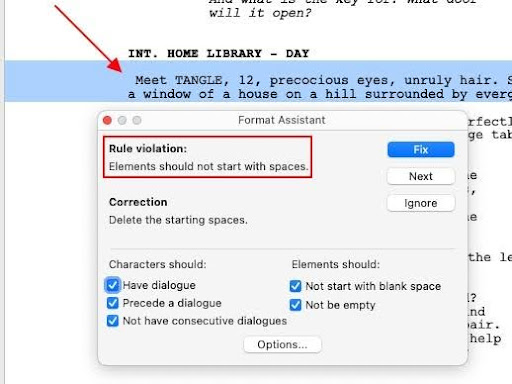
To correct an error, click Fix. The error is corrected and the search for additional errors continues.
In addition to fixing formatting errors, you should fix any misused words, spelling or grammar errors. Like most word processing programs, Final Draft does include a Spell Check tool. Go to Tools > Spelling (Home > Spelling is also an option for Windows users) and any misspelled words will be signaled out:
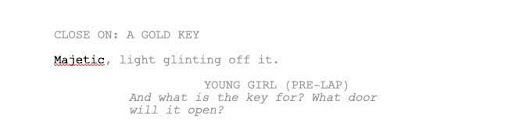
To accept the suggested spelling and continue spell-checking, confirm in the Change To or Suggestions fields and then click Replace or another option:
Even after running a spell check, you should manually proofread your script (more on this below). If a word is spelled correctly but is simply misused, a spell check won’t highlight it. This can happen more often than you think: there are some words that have only slightly different spellings but entirely different meanings (their, there and they’re; lose and loose, etc). At times our mind can autocorrect these misused words while reading without consciously being aware. This is why giving your script a final proofread is important.
If you want to quickly search your draft for misused words, run the Find and Replace tool in Final Draft. Go to Edit > Find, and you’ll open a window that’ll give you the option to either find a word and replace it with another word:
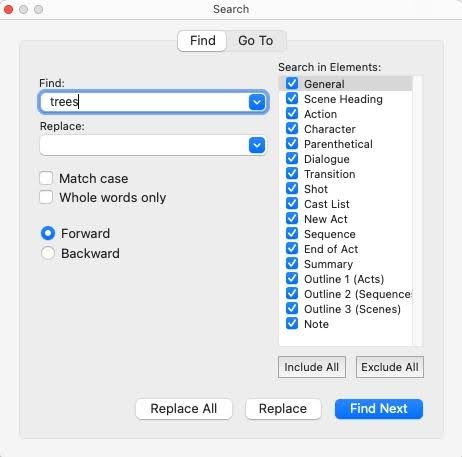
Type in the misused word in the Find field and every time it shows up, check to see if it’s used in the manner you intended. If not, type the correct word in the Replace field and click Replace. In this scenario, it’s important not to click Replace All because the word might be used properly in other spots of your script.
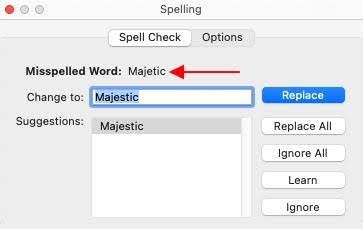
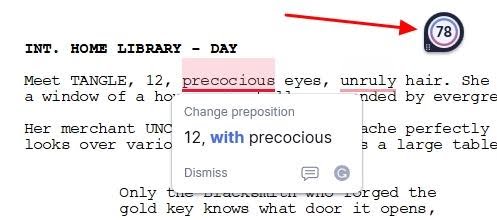
If you’re concerned about your grammar, Final Draft offers integration with Grammarly: a desktop app that reviews grammar, punctuation, spelling, clarity, engagement, detects plagiarism and suggests replacements for the identified errors.
If you have the Grammarly desktop app installed and running on your computer, you’ll see the Grammarly icon within Final Draft and it’ll automatically underline spelling and grammatical errors. You simply click on the Grammarly icon and a window opens with corrections you can accept or dismiss. Clicking on the underlined word or phrase will also show options for corrections in a popup menu:
Streamlining and Fine-Tuning Your Script
You should look out for characters with similar names (e.g., James, Jane, Jamie, etc). This oftentimes causes confusion for the reader, especially for busy industry professionals that might be giving your script a quick or cursory read.
Final Draft makes it easy to rename your characters throughout the script via the Rename Character feature. Go to Edit > Rename Character. To change a character’s name throughout your script, choose it from the Character to Rename dropdown menu and type the new name into the Rename To field:
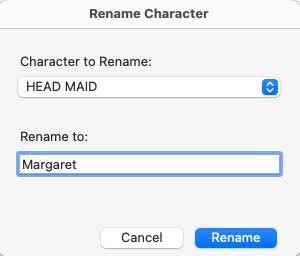
After the new name has been entered, click Rename and the name will be changed throughout your entire script (including character cues, dialogue, action, etc).
You should also make sure all of your scene headings are formatted correctly. As stated in our first lesson, always list the (micro) exact location before the (macro) greater location:

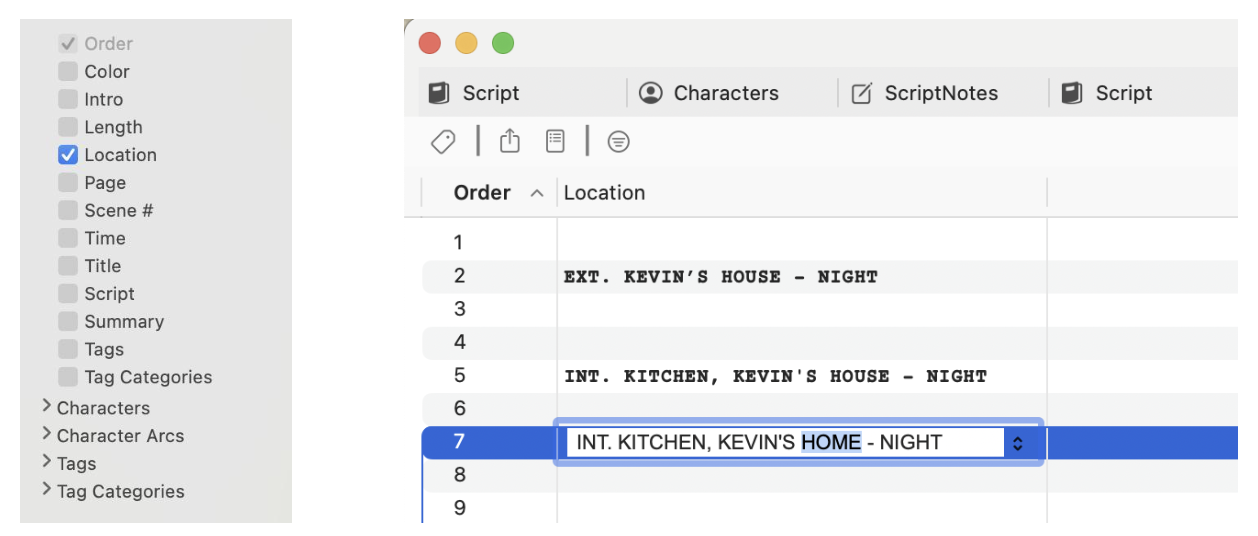
Also make sure your scene headings are consistently written. For example, if you refer to a location as “Kevin’s House,” don’t label it “Kevin’s Home” or simply “House,” in other scene headings. This is another error that Final Draft’s Navigator can help you with.
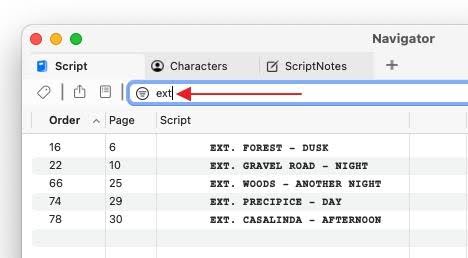
The Navigator gives you the ability to view and revise your script on a macro level. One great feature of the Navigator is it allows you to collect specific script elements in one convenient location for quick and easy editing. Go to the search filter (located directly beneath the tab headers) and type in “EXT” or “INT” and only those slug-lines will appear in the below columns:
If you want to filter EXT and INT scene headings in a customized tab, click the Add Tab button (+) and select Script:
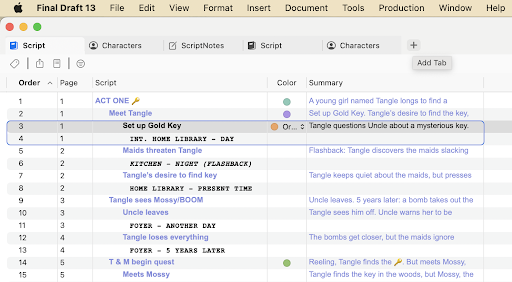
A menu will appear displaying various tab categories (location, characters, etc). Keep Location checked and uncheck every other category, and a new Script tab will appear with only your scene headings (both EXT and INT):
In addition to customizable tabs, Navigator 2.0 supports connectivity with your screenplay: any change to a script element in the Navigator will be reflected across your entire screenplay. So if you want to revise multiple script elements — like scene headings — the Navigator is the best tool for the job.
You may also choose to bold your scene headings. This is a common stylistic choice of contemporary screenwriters because it helps to visually break up the text on the page. It’s also an easy way to make your script look professional and reader-friendly.
Creating a Title Page and Exporting Your Script
Okay. Your script has been edited and streamlined and it’s now highly presentable. What’s next?
If you haven’t already, you need to create your title page. In Final Draft go to Document > Title Page. This opens the script’s title page in a separate document window:
Type the script’s title, your name, contact information and any other pertinent information over the sample text, and delete any unneeded sample text. When the title page has been edited, close the title page editing window with the red Close button at the upper left. This will return you to your script. When the script is saved, the updated title page will be saved as well.
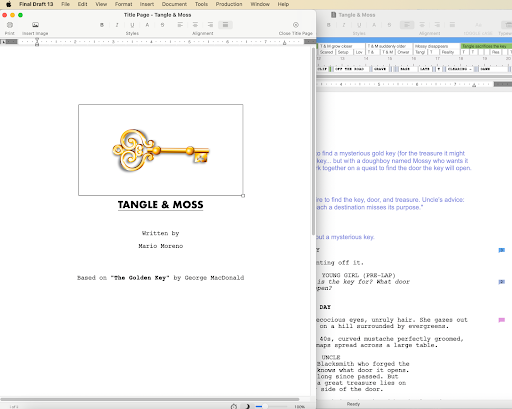
These days lots of writers insert an image when creating their title page. They might have a stylized font for the script’s title and then have a second page with an image that captures the spirit and vibe of their script. Think of it as “setting the mood.”
Final Draft allows you to insert images into your script if you want to create a title page with an image. Go to Insert > Image, which opens a standard dialogue box and navigate to and select a .GIF, .JPG, .JPEG or .PNG image. Place the image at the cursor in your script or title page and resize if needed:
Finally, it’s time to export your script and ready it for sharing.
Although anyone with Final Draft can open an FDX file, it’s best to email your script as a PDF file. Not only does this discourage third parties from making changes to your script, it’s simply more practical: most people can open and view a PDF regardless of their device and the program or apps they have on it.
Final Draft can easily convert an FDX file into a PDF. Go to File > Save to PDF. A window will open, giving you the option to Include Title Page, which you should check (submitting a screenplay or pilot without a title page looks unprofessional):
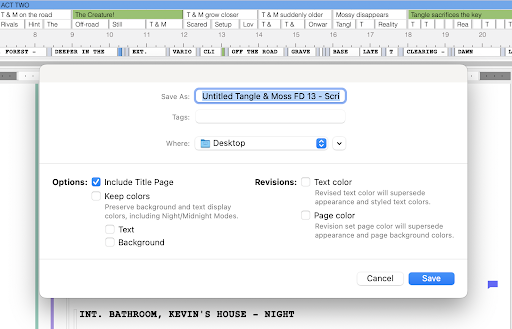
You should also save the PDF draft of your script to your computer’s desktop for easy access.
Proofreading and Final Edits
Before emailing the PDF file of your script, you should give it one last thorough proofread.
This is a good habit for writers because after weeks or months of reading your script as an FDX file, you might pick out certain mistakes or irregularities in the PDF file that you missed beforehand. Keep your original FDX file open as you read the PDF. Whenever you spot a mistake in the PDF, revise the FDX file.
When finished, save your script as a new PDF and make this one the file you go out with!
Script Editing
Edit and fine-tune your script with the above tools and give it a thorough proofread.
Good job! You’ve looked at your script from every angle and gotten it into great shape, but a script needs to go out into the world, be read and receive feedback.