Every great screenplay begins with a solid structure. Whether you’re writing your first script or refining your latest project, understanding how to organize your story is key to crafting a compelling narrative. Story structure and outlining aren’t just technical steps—they’re the creative framework that brings your ideas to life, providing rhythm, pacing, and emotional payoff.
Below we’ll break down the core elements of screenplay structure, walk you through how to outline your story beat by beat, and show you how to use Final Draft’s powerful tools to streamline the process. From your opening scene to your final image, you’ll learn how to turn a concept into a cohesive, professional screenplay—one step at a time.
Three-Act Structure
Before organizing your story beats and creating your outline, it’s important to understand the three-act structure that most screenplays utilize. At its core, the three acts represent a beginning, a middle and an end to your story.
In Syd Field’s book Screenplay: The Foundations of Screenwriting, he expanded the model for the three-act structure:
Act I (The Setup)
The Setup establishes the main character, including their primary relationships, living situation and aspirations.
Act II (The Confrontation)
The Confrontation sees the main character trying to pursue a goal while confronting various obstacles that build until there’s a major crisis or “lowest point.”
Act III (The Resolution)
In the Resolution, the main character finds a solution to the crisis and achieves their goal (unless it’s a tragedy).
Most mainstream Hollywood films follow this structure to this day, and if this is your first screenplay, you should stick with three acts and write your outline accordingly.
Organizing Your Story Beats
In our last lesson, we discussed story beats and utilizing the Beat Board™ to brainstorm and create beats. But now that you’ve got all these beats in your Beat Board, what should you do with them or, more to the point, how do you organize them?
First and foremost, think of your main character (aka your protagonist). Ultimately this is their story, and the story should be structured in a way that reflects this. The general trajectory of your protagonist should work within the three-act structure.
Anything dealing with your protagonist’s introduction, establishing their characteristics, their primary goal and “the inciting incident” (an event that causes your protagonist to take action) should be designated to Act I. Beats dealing with the various challenges or obstacles facing them as the story progresses should be designated to Act II. Finally, the story’s climax and resolution should be designated to Act III. Once again, a beginning, middle and end.
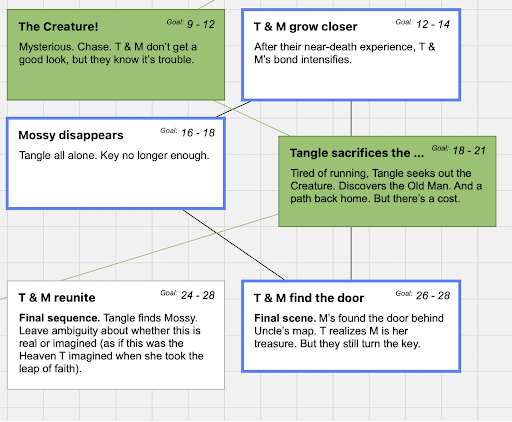
Beats within the Beat Board in Final Draft can be color coded. On a Mac, Control clicking will open a list of colors to choose from. On Windows, right-click to open the list of colors. At the bottom of the list is a custom color option, which brings up multiple options for creating colors. This is a good way to organize certain beats that have a relationship to each other. Assign colors for each act, so upon a cursory glance, you know whether a beat belongs in Act I, II or III:

Cause and Effect Structuring
Once you’ve got your beats color-coded and their acts designated, you can organize them further and into a chronological framework.
If you want your script to be as engaging as possible, it’s good to use “cause and effect” structuring when organizing your beats. Cause and effect is the relationship between two things when one thing makes something else happen. For example, a security guard triggers an alarm and it causes a bank robber to shoot the guard. Now the character is not just robbing a bank, he’s also a murderer, and the consequences are even greater if he’s caught. Perhaps the character realizes this and it causes him to panic, and he makes further mistakes, and these mistakes lead to other obstacles.
Keeping your character(s) in constant peril or conflict is important to cinematic storytelling, and it’s a good way to avoid a “second act slump” where your story runs out of steam. A cause and effect structure will help you to achieve this. Each beat leads you to the next beat:
This thing happened, therefore…
…this thing happens as a result.
or:
This thing happened, but…
…this thing happened to counteract it!
The more you do this, the stronger the connective tissue between your beats will be.
Character Arcs and Emotional Through Lines
In addition to being mindful of cause and effect, you should always be tracking your protagonist’s character arc and emotional through line. A character arc is the change your character goes through during your story. An emotional through line is how they’re feeling throughout.
Think of some of your favorite films and ask yourself: how is the protagonist different at the beginning of the movie than they are at the end? Are there any scenes when we don’t know how they’re feeling about a sudden plot turn or important event? The more you do this, the more you’ll start to see discernible patterns.
Now with this in mind, think about your protagonist when structuring your beats. How are they feeling about what’s happening? How are events changing them?
If you want to connect certain character beats with coinciding story beats, you can use Flow Lines in the Beat Board. Right-click or Control-click to open the beat context menu and choose “connect”:
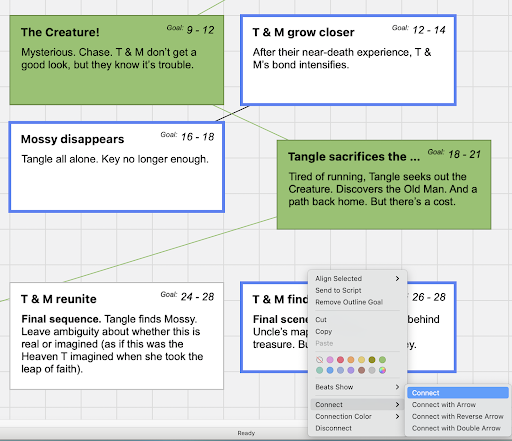
You can also connect beats by dragging one beat on top of another beat until the bottom beat dims, and then let go. You can disconnect beats the same way: simply drag one connected beat above another connected beat until it dims to disconnect them. You can also select the beats to be disconnected by right-clicking or Control-clicking to open the context menu, and choose “disconnect.”
The color of a flow line can be changed by right-clicking or Control-clicking on the line itself and selecting a color from the connection color menu that pops up to the right. This is helpful if you’re tracking different things in beats via color coding.
Perhaps you have assigned a color to all your beats tracking your protagonist’s character arc and you want to connect them to a story beat that inspires a change in them (whether it’s a failure or success). A color-coded flow line will help you connect the character arc with the desired story beat:
Creating Your Outline
Once you’ve got your beats all structured, you’re ready to create your outline.
The Beat Board works in conjunction with the Outline Editor™ (located directly beneath the Toolbar) so you can easily create an outline within the same document.
The Outline Editor’s top two horizontal lanes are labeled Outline 1 and Outline 2. One way to use the dual lanes is for Outline 1 to represent acts and Outline 2 to represent beats:

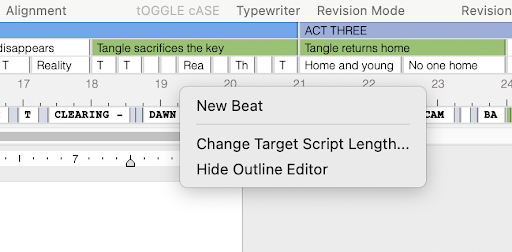
Beneath these two lanes is a numbered lane, resembling a ruler, which represents page numbers (aka the Page lane). Most feature screenplays are between 90 to 120 pages, so this should be your page range. To change the target length, simply right-click on the Page lane, select “Change Target Page Length…” and type in your desired page length:
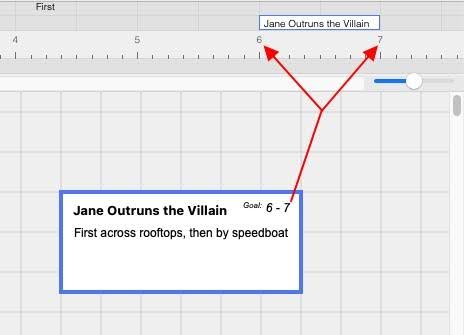
If you know which page you’d like a specific beat to occur by, simply drag the beat to the appropriate spot on the Outline Editor:
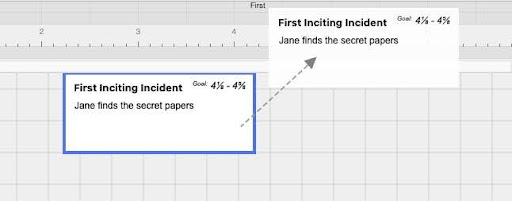
An Outline beat in the same color will appear above the page number. The corresponding beat on the Beat Board will update to show the current Outline beat’s page:
Throughout the outlining process, you can always revise and rearrange your beats. This allows you to improve your outline without having to start from scratch.
Any changes made to a beat on the Beat Board will be reflected in the Outline Editor and vice versa. If the Beat Board is a virtual wall with index cards, the Outline Editor is a bridge from that wall to your script.
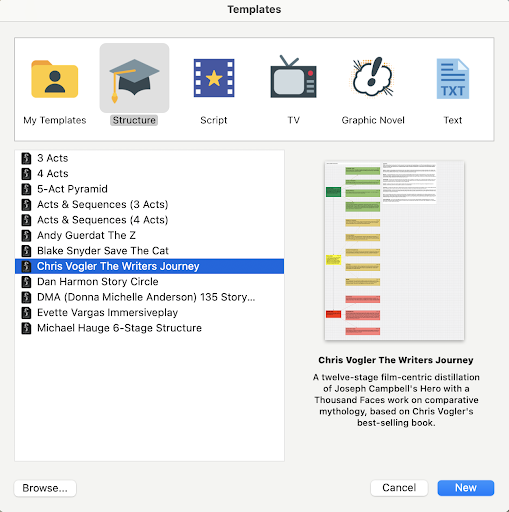
Final Draft Screenplay Templates
Final Draft also has built-in templates for popular story structures with the basics already filled (e.g., Save The Cat, Writer’s Journey, Story Circle, etc). To view these templates or build your outline from one of them, go to File > New From Template and select from the Structure category:
Whether you’re using one of these templates or working from a blank template, the three-act framework should be adhered to and your story structured accordingly.
Using the Beat Board and Outline Editor
Use the Beat Board and Outline Editor to structure your entire story per the above steps.
Now that you’ve finally done the work of structuring your script, it’s time for the fun part: writing it!
We’ll cover moving your outline to the script and give you tips for writing your first draft in lesson four.